Custom Shopify themes can be a potent asset in an online store’s arsenal.
They provide your Shopify store with flexible stylistics and functionality that you may use to stand out from the competition and increase conversions.
This guide will dissect how merchants can create custom themes and build unique websites with them.

Designing a Shopify theme from scratch
There are coding and non-coding solutions when it comes to designing a Shopify theme from scratch.
Coding Solutions
If you wish to get into Shopify development, you’ll need a development environment. For that, you must have the following:
- Shopify CLI (for online store 2.0 themes).
- A Shopify Development Store. This may be accessed using a Shopify Partner Account.
- Access to the store’s themes if you’re using a staff or collaborator account.
- The store’s URL.
You would also need Node, Git, and Ruby.

To install Shopify CLI, run this command “npm install -g @shopify/cli” on any terminal.

Then type in the command “mkdir FOLDER NAME” (folder name can be anything) to create a folder on your system.
Then type “cd FOLDER NAME” to navigate into the newly-created folder.
You have two options:
Pull a theme from your Shopify online store

For the first option, run the command “shopify theme pull --store YOUR STORE URL”
Press any key and log in to Shopify.
You’ll see a list of themes you can download. Select a theme to download.
Clone Shopify’s Dawn theme

Run the command “shopify theme init” then enter a name for this new theme. Wait for the download to complete.
The theme files should be ready in the folder you created. You may begin editing these files.
Navigate to “http://127.0.0.1:9292”, preferably on Google Chrome, to preview real-time changes you make to your theme.
There’s a lot more to discuss when it comes to editing a Shopify theme. Coding a theme from scratch requires a masterclass of knowledge—one we don’t have time to delve into in this guide.
Get a Shopify Partner

It may be more efficient to outsource help from experts instead of doing it on your own.
After all, there are other aspects of a Shopify online store that need your attention as well.
Go to the Shopify Partner Directory

Then navigate to Store setup and management > Theme customization.
Go through the list of partners and find one that best suits your needs and budget.

Clicking any of them will show you their contact information, services provided, and customer reviews.
Non-Coding Solutions
Not everyone’s adept with a programming language, nor does everyone have access to a Shopify developer.
However, that doesn’t mean only developers can benefit from Shopify theme customization
A handful of solutions allow Shopify merchants to achieve developer-level customization without learning how to code.
Start With a Theme
You can achieve custom theme-level configuration for your Shopify store by starting with a theme—any theme, even Dawn.
We recommend that you start with a theme that offers more customization options over a free theme, though. Take Shine, for example.

You can use any theme—whether paid or free.
Free themes can attract merchants, considering they don’t cost anything.

Paid themes, on the other hand, come with added features, customer-converting functions, and additional stylistic elements that merchants may configure (i.e., the crawling text on the Blum theme, shown above), making paid themes more customizable than free ones.
Explore more Shopify 2.0 themes now
Customize your Shopify Theme
An adept understanding of the Shopify theme editor, paired with some Shopify apps, will allow you to create a website seemingly from scratch without needing to know how to code.
More on customizing your Shopify theme later in this guide.
Use a Drag-and-Drop Page Builder

As the name suggests, drag-and-drop page builders let users create pages with ease—making page building as simple and intuitive as dragging and dropping.
Merchants can place elements on the screen as they desire and move them anywhere on the page without difficulty.
4 Steps on How to Customize Shopify Themes
Here are four crucial steps you need to follow to customize your Shopify theme. You’ll also find tips to level up your theme customization.
Step#1: Choose Customizable Shopify Themes
All Shopify themes are, in some sense, “customizable.” However, some are more than others.

You can follow along throughout the rest of this guide with just the default Dawn theme. But other themes, particularly paid ones, can provide more adjustment options for better customization choices
You may look for more themes in the Shopify Theme Store.

We also recommend using some themes from SalesHunterThemes, given the themes’ high-customization and one-time-payment pricing. SalesHunterThemes is a professional theme design and developer. We support 24/7 customer support, beyond just one-time purchase.
Whether a theme is paid or free, you may try it out by clicking “Try theme” from its Shopify App Store listing.

Then click on Customize next to the theme you wish to explore.
You may then decide if that theme has the configurability and tools that you’re looking for before purchasing.
However, if you’re planning to publish your website with a paid theme, you must pay for the theme first.
Find Shopify niche themes:
Step#2: Basic Shopify Theme Customization
There are a few beginner-level, no-code Shopify theme customization options that you can apply from the Shopify theme editor that can constitute a significant change for your website—stylistically speaking.
The most noticeable changes you can make include the colors and typography. With Shopify theme customization, editing just these two, paired with your unique brand graphics and assets, can make for a stand-out and engaging website.
Here’s how you can customize your shopify theme
Colors
Go to the Shopify theme editor.

Click a section of your webpage. You’ll see the Color scheme option in your editing panel. This allows you to change the selected section’s color scheme with any of the pre-set color schemes.

You may give different sections corresponding color schemes to arrive at a desired result.
We can also edit the color schemes’ color combinations, giving our website a completely different appearance from the theme’s initial configuration.
Tread lightly if you're not too confident with your design skills.

Click on the gear icon on the left side of the screen.

Choose the Colors dropdown.

Click on “+ Add Scheme.”

Then, click on a section of the page that you want to apply the new scheme. Assign it the new color scheme and select Edit.

You may then tweak the colors for each of the areas as needed.
Typography
Go to your Shopify theme editor.

Click the gear icon and select the Typography dropdown.

There are two sections in this dropdown that you’d want to take note of—the headings font and the body font.
You may edit both the headings font and the body font to the style you desire.
We suggest previewing changes in your product page or a blog page since those would typically contain more condensed header and body text.

Underneath either the Headings Font or Body Font section, click Change.
Choose the font you want and click Select.

You may also use the font size scale settings to enlarge or shrink the text within your website.

The Shine Theme has additional font settings that allow merchants to decide whether text in other areas of their website (e.g., buttons, menu items, etc.) will use the heading settings or the body settings.
How to upload custom theme to Shopify?
First, acquire a font.
We recommend using OTF, WOFF, and WOFF2 file types since these are significantly smaller than TTF, and, hence, would load faster on the website.

Go to Content > Files from the Shopify admin panel.
Click Upload Files and select the font file you wish to use.

Once the font is uploaded, click on the link icon corresponding to the file you just added. This copies the file link.
Now, go to Online Store > Themes.

Click the three dots next to the theme you wish to use your font with.
Then select Edit code.

Navigate to Assets > base.css.

Scroll down to the bottom and type the following:
@font-face { font-family: FONT NAME; src: url('FONT URL'); }
Replace FONT NAME with the name you want to give the font.
Replace FONT URL with the file link we copied earlier.

In another browser tab, visit your Shopify site.
Right-click on the page and click inspect.
Use the shortcut Ctrl + Shift + C then hover over the text you want to apply the new font to.

This will contain any of the following HTML tags: H1, H2, H3, H4, H5, H6, and p.
In our case, the text we want to edit contains an H2 tag.

Go back to the code editor and place the following below the line we pasted earlier.
H2 {
font-family: FONT NAME !important;
}
Then click Save.

Note that this will change all text containing the H2 tag.
Step#3: Create a template
Whenever a new page is created, it's typically assigned to a template.
For example, a newly created blog page may be assigned a blog template.
Furthermore, templates can be customized with apps such as forms, audio players, and widgets, among other utilities, that can make for a truly unique outcome.
To create a template, go to the Shopify theme editor.

Navigate to Homepage > Pages > + Create Template.

Name it, and then underneath “Based on,” choose Default Page. This option will give you a blank canvas to get started with, providing more room for creativity and customization.
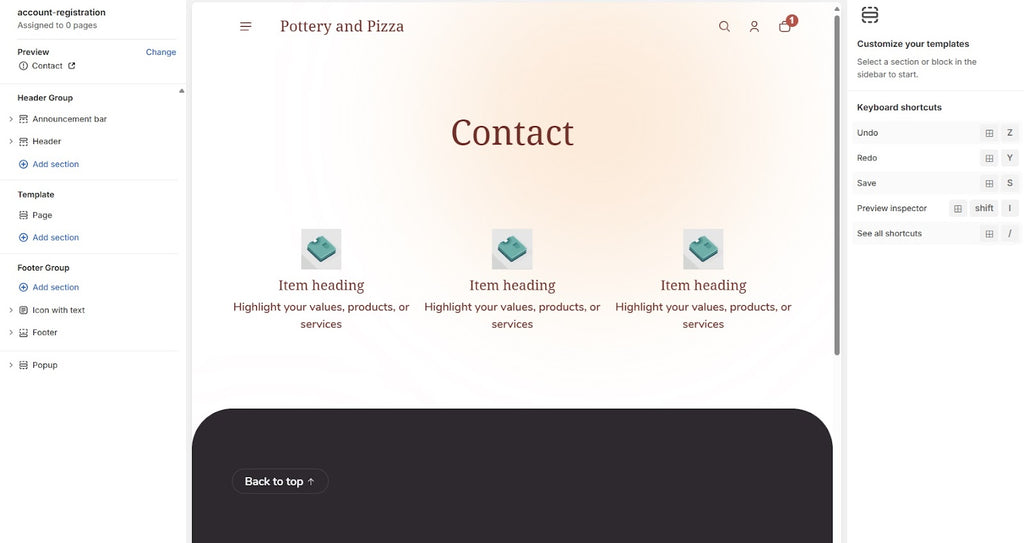
After creating your template, you’ll be taken to a page where you may edit the newly created template.

Click “+ Add Section” and choose from the dropdown the section you wish to add.
There are 17 sections to choose from if you’re using Dawn. The sections you can add will depend on the theme you’re using.
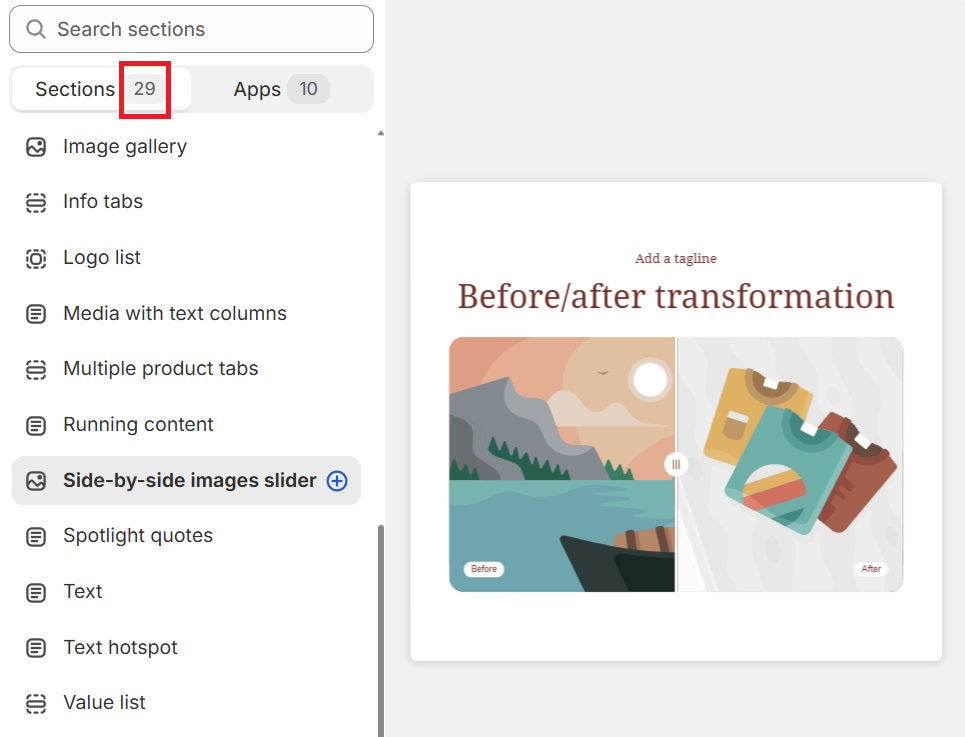
But if you’re using Shine, you’ll have 29 sections to choose from.

Underneath the sections, we have blocks.
So it looks like:
- Section
- Block
- Block
- Block
- Section
- Block
- Block
You may drag each block and section around to rearrange their positions.
Take some time to get to know each section and block.

Once you’re done creating your template, you may apply these to newly-created pages.

To do that, go to Online Store > Pages.
Select or create a page, and underneath the Theme Template dropdown, assign the newly-created template to it.
Step#4: Use apps in the Shopify App Store to customize your store
You can provide further customization for your Shopify theme with the help of apps.
We’ve listed below some that can provide an added layer of configuration and improved conversion for your store.
Judge.me

This testimonials app can display reviews and star ratings on your Shopify store. This allows you to place testimonials on the home page and product page, making your site appear more authenic and verified.
Hextom: Sales Boost
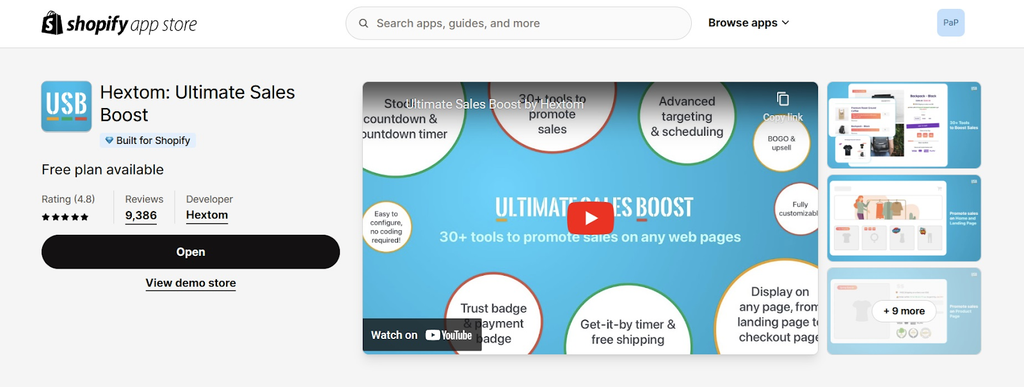
Hextom provides an extensive toolkit of converting widgets such as a free shipping bar, a countdown timer, an inventory countdown, trust badges, and sales stickers to name a few.
Shopify Forms

Shopify Forms allows merchants to gather information from site visitors—usually emails for email marketing purposes. But Shopify Forms can also collect personal information, should a customer or company want to create an account with your online store.
Examples of SalesHunterThemes
SalesHunterThemes has three highly customizable themes to choose from that you can customize your Shopify store with.
Shine
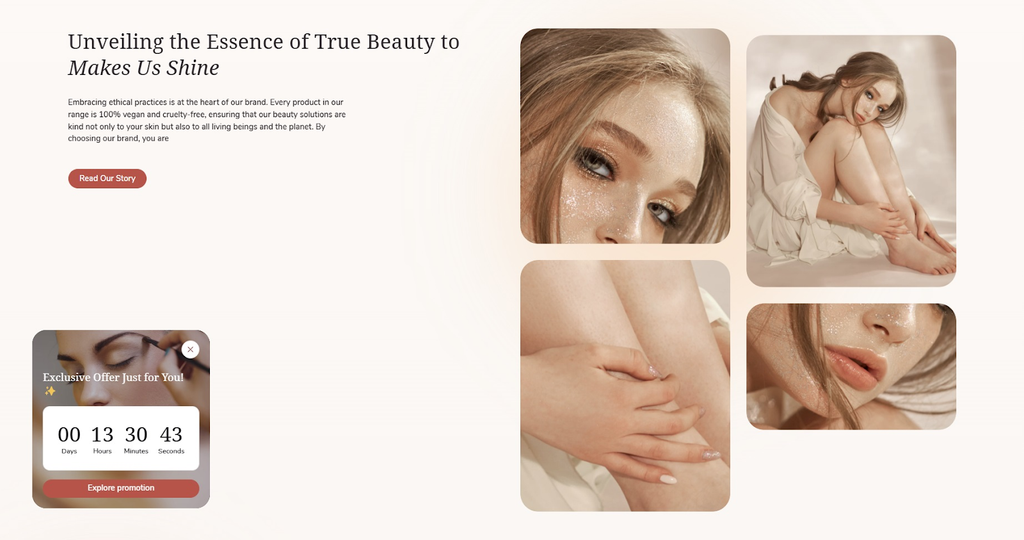
Shine’s starting configuration is an ideal theme for jewelry, home decor, and beauty and cosmetic businesses. But changing up the colors, typography, and media can make it an ideal custom theme for any online store.
It’s made all the more potent with its custom sections that aim to convert, like its countdown timer.
It also features a “side-by-side images slider,” perfect for before-and-after content.
Electro

Electro is a tech-centered theme, providing custom sections optimized for tech companies. One notable section is the product comparison section, where customers can compare device specs.
There’s also the text hotspot that allows customers to learn more about a product from strategically placed buttons on an image—ideal for complex products such as tech and appliances.
Blum

Blum is a relatively loud but non-overwhelming theme that can pique interest and draw attention.
Its mega menu section provides images with its navigation section, giving your ecommerce site a bolder presence online.
It also contains attention-calling running text, a countdown timer, and other converting on-screen elements.
Tips for customizing your Shopify theme
There are a few crucial web design principles to remember when creating an engaging and highly converting store.
Adopt an On-Brand Color Scheme
The visual aspect of your website will be the first thing people notice when visiting your store. So, make sure your color scheme communicates your brand personality and identity.
Also, compliment your buttons’ colors with the rest of the page. This not only provides the website with some needed accentuation but also draws attention to the crucial CTAs.

Notice how the Solodrop theme shown above uses green buttons with a purple color scheme.
Use Images and Videos
Placing media on your Shopify store gives a more dynamic and engaging experience for your site visitors.
Images and videos have a multitude of uses for a Shopify website—they can display how the product looks and they can show the product in action.
Having media also keeps site visitors lingering on the page longer, as opposed to just using text.
Add Testimonials Wherever Applicable

Testimonials are real, authentic social proof of your product’s effectiveness.
They eliminate any hesitation customers may have about your product. When people see that others are enjoying the product, they’re likely to try it for themselves too.
Testimonials are typically placed on the lower parts of the homepage—after the visitor scrolls through the product information. These may also be found on product pages where they’re conveniently near the “Add To Cart” and “Buy Now” buttons.
Use Headers Strategically

The strategic use of headers guides customers’ eyes towards more important text instead of overwhelming them with chunks of paragraph text.
With headers, customers are more likely to read through a page’s copy. And even if they skim, they’ll immediately see the value propositions you wish to convey.
FAQ
Can I create my own theme on Shopify?
Yes, you can.
But you may also take an existing theme, make some customizations and configurations, and end up with a website that seems as if it’s built from scratch—with much less headache and effort too.
Is it hard to make a Shopify theme?
If you aren’t already a developer, acquiring the necessary skills for coding a Shopify theme from scratch can be difficult
However, there are no-code alternatives to making websites with custom stylistics and functionality that are significantly easier than coding from scratch.
How much does a Shopify custom theme cost?
The Shopify custom theme cost is from free to $400 on the Shopify theme store. But there’s no limit to what developers may charge.
Are Shopify free themes customizable?
Some themes are more customizable than others. While free themes are customizable in the Shopify theme editor, paid themes may offer a higher degree of customization than their free counterparts.
Is Shine Theme Customizable?
Shine theme is highly customizable, even more than the typical free themes. It contains 28 customizable sections, including a countdown timer pop-up, a countdown timer block, a customer reviews section, a side-by-side images slider, and text hotspot.
Conclusion
Setting your online business apart from the standard Shopify store can be pivotal in improving customer engagement and brand experience.
A custom Shopify theme can help usher in that much-needed change. It may seem like a daunting task to create a custom theme from scratch, but the Shopify theme editor, plus some apps, can provide tremendous assistance in building a stylistically unique, successful store.

