A Shopify password page protects your store’s content from public view, allowing you to lock Shopify store access for specific content.
This means that site visitors need to “log in” to your Shopify store to view specific content.
In doing so, this page effectively limits your site visitors to a particular type of audience.
To clarify, the Shopify password protect page we’ll discuss in this guide will require customers to know the store’s password. It’s not one where customers need to create an account.
Note: Some tips in this guide might not apply to Shopify trial users.
Trial stores are password-protected until the merchant gets a paid Shopify plan. We’ll elaborate more as we go through this guide.
Shopify Password Page Classifications
The password page can be classified into four types—the password page that protects the whole online store, a specific password-protected page, password protection for products and collections, and a trial store password page.
Shopify Password Protect Page of your Store

This password protects the entire domain. So when visitors visit any page on the site, be it the homepage or a product page, they’ll be greeted with a password prompt.
Shopify Password Protect Page for a Specific Page
Since this only protects a specific page, the public can preview and navigate the rest of the website.
This allows you to show gated content to a few people without closing off the entire store using the Shopify password protect page feature.
Shopify Password Protect Page for Specific Products and Collections
Merchants can hide certain products and collections, limiting their visibility and access only to a select few.
This is ideal if you want some exclusivity with your products.
Trial Store Password Page Shopify

The Shopify password page works differently for a trial Shopify store compared to stores on a paid plan.
Instead of displaying the theme’s password page, the Shopify system’s password prompt is shown instead.
This password page can’t be tweaked or edited. You can’t change the appearance of this password page or its display message.
As a result, a trial store password page isn’t ideal for teasing upcoming content or as an “under construction” cover.
Also, this password page remains on your entire domain until you get on a paid Shopify plan.
How Shopify Password page help merchant lock Shopify store?
There are a bunch of reasons why merchants would want to lock Shopify store access using password protection.
These include, but are not limited to creating a testing environment, getting internal approvals, and providing exclusive content to “higher-tiered” customers.
Create a Testing Environment

Web designers and developers are free to explore if you have a password-protected site.
They can test designs, apps, and custom code on the site and see how they function—all without opening these half-baked goods to the public just yet.
A testing environment eliminates guesswork and allows the people working on your site to implement the crucial features that your site needs.
Approvals and Other Internal Workflows
There’s only so much that mock-ups and images can do.
Marketing higher-ups and executives can experience the site better if they can explore and navigate it as if they were customers. This is more engaging and intuitive as opposed to discussing website changes over static photos and mocked-up layouts.
Since the site would be password-protected, only the internal team can access it.
This also means that the general online public wouldn’t be walking into the “construction zone” and seeing all the mess.
Provide Exclusive Content
You can keep exclusive content behind a Shopify password page to allow access to only qualified visitors and customers.
This allows you to provide “tiered” benefits to customers, which may improve your brand loyalty when executed properly.
Just note that there are other more sophisticated and secure ways of providing exclusive content than using a password page with a single, non-unique password.
How to Add Password Page to Shopify

From the Shopify admin panel, go to Online Store - Preferences.

Source: Updimes
Scroll down to the Restrict store access section.
Tick on the check box labeled “Restrict access to visitors with the password.”
Set the password.
A little tip: Don’t just set any random password when you lock Shopify store access. If the password will be used for internal purposes, cohesiveness won’t be a concern. But if it will be used by exclusive customers, this password will play into your branding. So, when deciding on a password to lock Shopify store access for exclusive content, make sure the password reinforces the brand identity.
Source: Updimes
Provide a message as well on your password page.
Input in the “Message to your visitors” section what you want to tell your visitors.
Make sure to inform customers why the site or page is password-protected and what you expect them to do. (e.g., “only customers who bought the premium package can access this site;” “We’ll be back on Sep 12, 2024.”)
Be brief and concise, since you only have 5000 characters.
But we may override this character limit and create a more engaging password page. We’ll discuss this in more depth later in this guide.
Note: Shopify trial users can’t include a message alongside the password page. Shopify sets the message to “This store is password protected. Use the password to enter the store.” You can’t change this unless you get on a paid plan.
Click Save to apply your changes.
How to Edit Shopify Password Page?
You can make your password page more engaging, appealing, and on-brand.
We need a password page that properly reflects our brand, just like those “Coming Soon” and “Construction Ongoing” tarpaulins that under-construction restaurants use.
Note: If you’re a trial user, Shopify will always display the default Shopify password-protected page, regardless of how you edit your password page. So if you want to level up your store’s password page, get on a paid plan.
Step#1: Choose a Theme to customize shopify password page for your store

The more customizability and sections your Shopify theme has, the better you can customize shopify password page for your online store.
The Shine theme has nearly 30 custom sections to choose from.
While you may not need all these for a password page, you may certainly benefit from a countdown timer that displays the remaining time before the page is expected to go live.

Luckily, Shine provides a countdown timer option alongside its various banners.
So you may add a video banner with a countdown timer to tease visitors about the upcoming content, if you wish. Doing so will retain engagement and customer retention.
Step#2: Go to the Shopify Theme Editor

Go to the Shopify theme editor to make the necessary changes to your password page.
You may edit the password page just like any other page on your website.
Step#3: Make Your Desired Changes to the Password Page
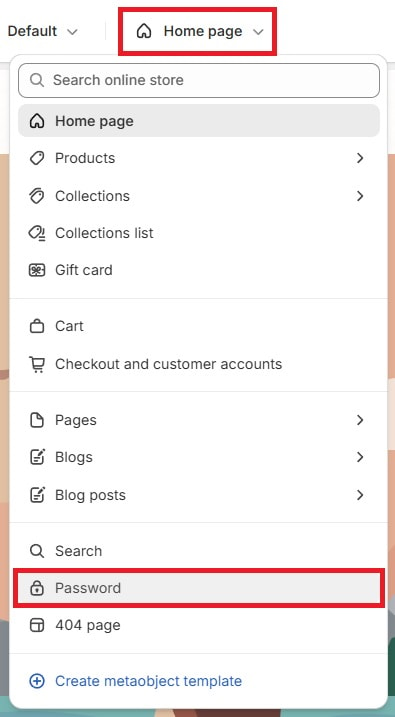
Once you’re in, click on the page dropdown. It should be labeled “Home page” with an arrow pointing down.
In the dropdown, click on Password.
This will let you edit your Shopify store’s password page.
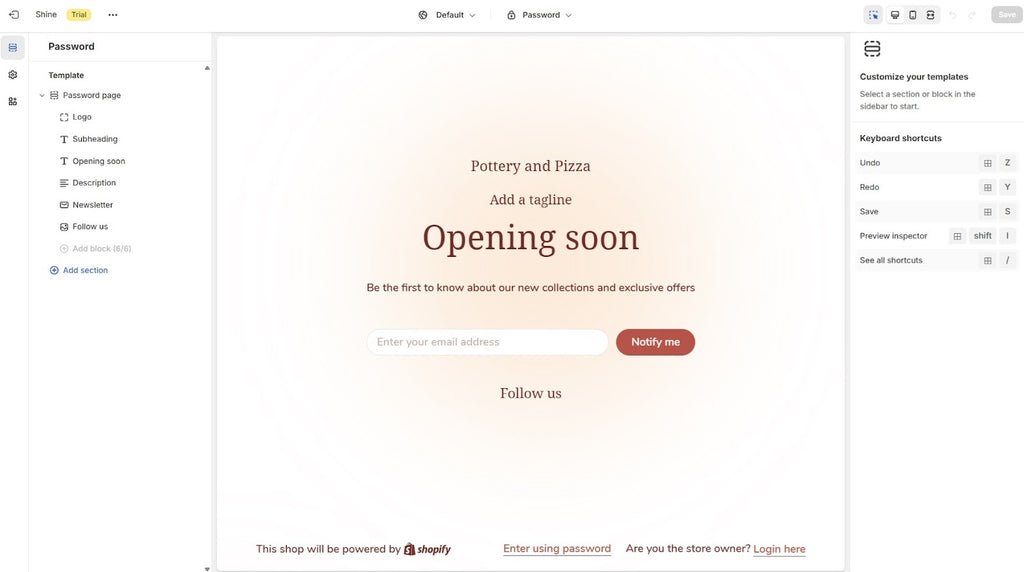
Shine theme’s default password page configuration includes:
- The Shopify store logo
- Some text blocks
- A newsletter section that lets visitors opt-in for email marketing and notifications.
- Social media buttons
Shine users may even add a background image to the entire password page section.

Clicking on a section or block on the left panel will display different customization options on the right. Simply click the Password Page section.

Then on the right panel, choose the images you wish to use for the background.
Shine lets users choose different images for the desktop and mobile layout of the Shopify store. You may set different images for these platforms, if you wish.
Step#4: Add Sections to the Password Page
We can add more to the password page to keep visitors engaged and anticipating.
For this example, we’ll add a video banner with a countdown timer to our password page.
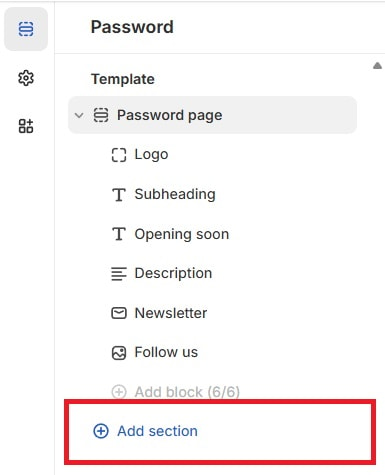
Click on + Add Section.
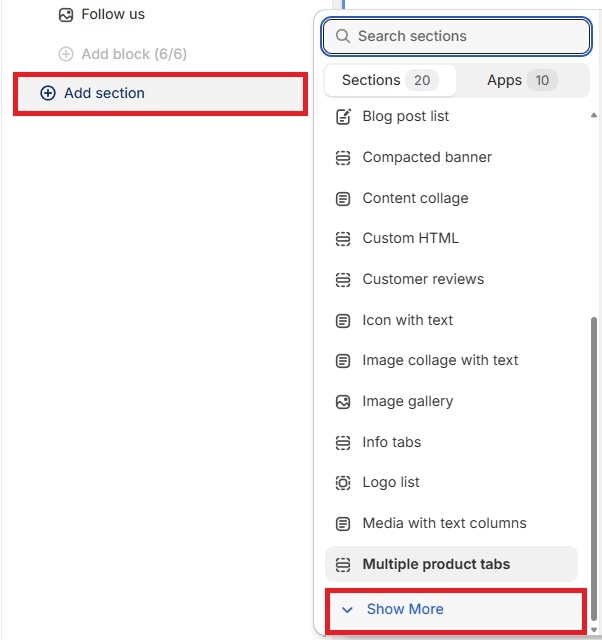
Scroll down the selection list and look for Video Banner. You may need to click See More to find it.

Click Video Banner.

By default, the video banner section will contain some text blocks, a countdown timer, and some buttons. Add and remove blocks as you see fit.
We suggest putting this above the password page section to hook site visitors in.
Adding a Video Background

To add a background video, click on the Video Banner section on the left panel.

Then on the right panel, choose between “External” or “Shopify-hosted” for the video source.
External will require you to paste a Vimeo or YouTube URL for your background video.
Shopify-hosted lets you choose a video from your Shopify files.
Adding a Countdown Timer

Once you have your video, click on the Countdown Timer block on the left panel.

Then set the end date and time of the maintenance period on the right panel. That way, the countdown timer will be counting down the remaining days, hours, minutes, and seconds of your site going live.
Step#5: Finalize Changes to Your Password Page
After you’ve added the timer and video, spruce up the password page’s stylistics.
Make sure it's presentable and on-brand.
Finalize your changes by clicking save.
Step#6: Activate Your Password Page
All that’s left to do is activate password protection for your site.
Make sure to enable it from the Online Store - Preferences section. (Refer to the “How to Add Password Page to Shopify” section of this guide.)
How to Password-protect a Specific Page
Password-protecting a specific page will require some tinkering with the theme’s code.
But for this guide, we'll use a Shopify app to make the process smoother and easier.
Step#1: Install a Password Page App
First, go to the Shopify app store.
Search for “password page.”
A lot of the options are B2B solutions that wholesalers can use to hide wholesale prices and products from their retail customers.
But store owners may also use these apps to gate their pages.

For this example, we'll use Sami B2B Lock since it’s free and has a 4.9 star rating on the Shopify app store.
Install the app.
Step#2: Set Up Your Locks
Open the app

Select the Locks section on the left panel.

Click Create Lock.
You’ll be taken to the app’s lock configuration.

Underneath Lock Resources, select Specific page. Then tick the pages you’d like to lock.

You may choose your gating method in the Lock Conditions section. But for this guide, we’ll choose Visitors with passcode.

Input your desired passcode then click Add Passcode. You may add multiple passcodes if you wish.
Then place in the passcode message and access duration.
Click Save.
Step#3: Integrate It With The Theme
Go to the Shopify theme editor.

Click on the app embeds icon. It’s underneath theme settings (gear icon) on the left.

Tick on Sami Lock to enable the lock you created on your Shopify store.
Great! Your private page is now locked. Albeit lacking in design, though.

If you want to customize shopify password page for your online store with the Sami Lock, enter a live chat with their team.
Go to Sami Lock's home dashboard and click Start live chat.
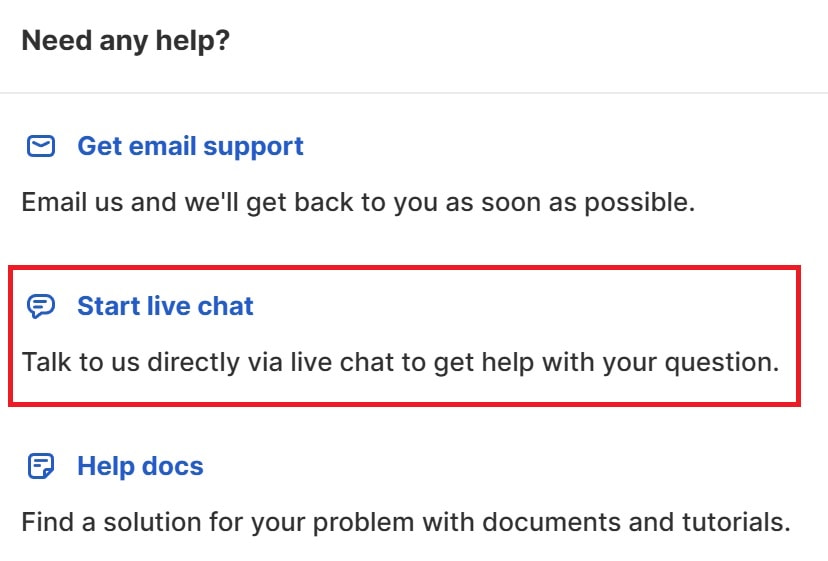
They’ll implement your design requests for the locks you’ve created. You may even use the password page you created earlier as a design reference for their team.
After that, they’ll send you custom CSS to include in your current Shopify store.
Sami’s customer support is quick and responsive, so creating a custom-designed lock shouldn’t be a burden.
How to Password-protect a Specific Collection
In this guide, we’ll use the same method to gate our products and collections.

This time, when setting up your locks on the Sami app, select either Specific Products or Specific Collections.
Then choose the respective products or collections you wish to password protect.
You may customize your gating method further in the app to suit your needs.
But just like we mentioned earlier, if you wish to edit the design of this new lock, you’ll need to request the design and layout via Sami’s live chat.
FAQs
Where is the password page on Shopify?
The password page on Shopify is a special page that restricts access to your online store while it's under construction or during a private sale. You can access and customize shopify password page for your online store in the Shopify admin by navigating to Online Store > Preferences and scrolling to the "Password protection" section.
How to change the password page background in Shopify?
To change the background of your password page in Shopify, go to Online Store > Themes in your Shopify admin. Click on "Customize" for your current theme, then select "Password Page" from the page selector. You can upload a new background image or adjust the color settings under the "Background" section.
How do I disable the password page on Shopify?
To disable the password page on Shopify and make your store public, go to Online Store > Preferences in your Shopify admin. Scroll down to the "Password protection" section and uncheck the "Enable password" box. Save your changes, and your store will be accessible to everyone.
How do I customize my login page on Shopify?
To customize your login page on Shopify, you can use the theme editor by going to Online Store > Themes in your Shopify admin, then clicking "Customize." Look for the "Login" page or "Account" section, where you can adjust the layout, add custom branding, or change the colors and fonts.
How do I add 'Remember Me' to my login page on Shopify?
To add a 'Remember Me' option to your login page on Shopify, you'll need to modify the code of your theme. This involves editing the customer/login.liquid file within your theme’s code. You can add a checkbox for 'Remember Me' using custom HTML and ensure it functions properly with JavaScript. If you're not comfortable editing code, you may want to consult a Shopify expert or developer.
Conclusion
A password protection page secures your online store while you're making crucial changes to it. This makes it so that visitors don't walk into the under-construction store.
It also acts as a gate for exclusive content, such as wholesale prices and exclusive products.
But you may also want to explore setting up exclusive catalogs and customer log-ins. This is another gating method that you may benefit from, especially if you're a wholesale business.


